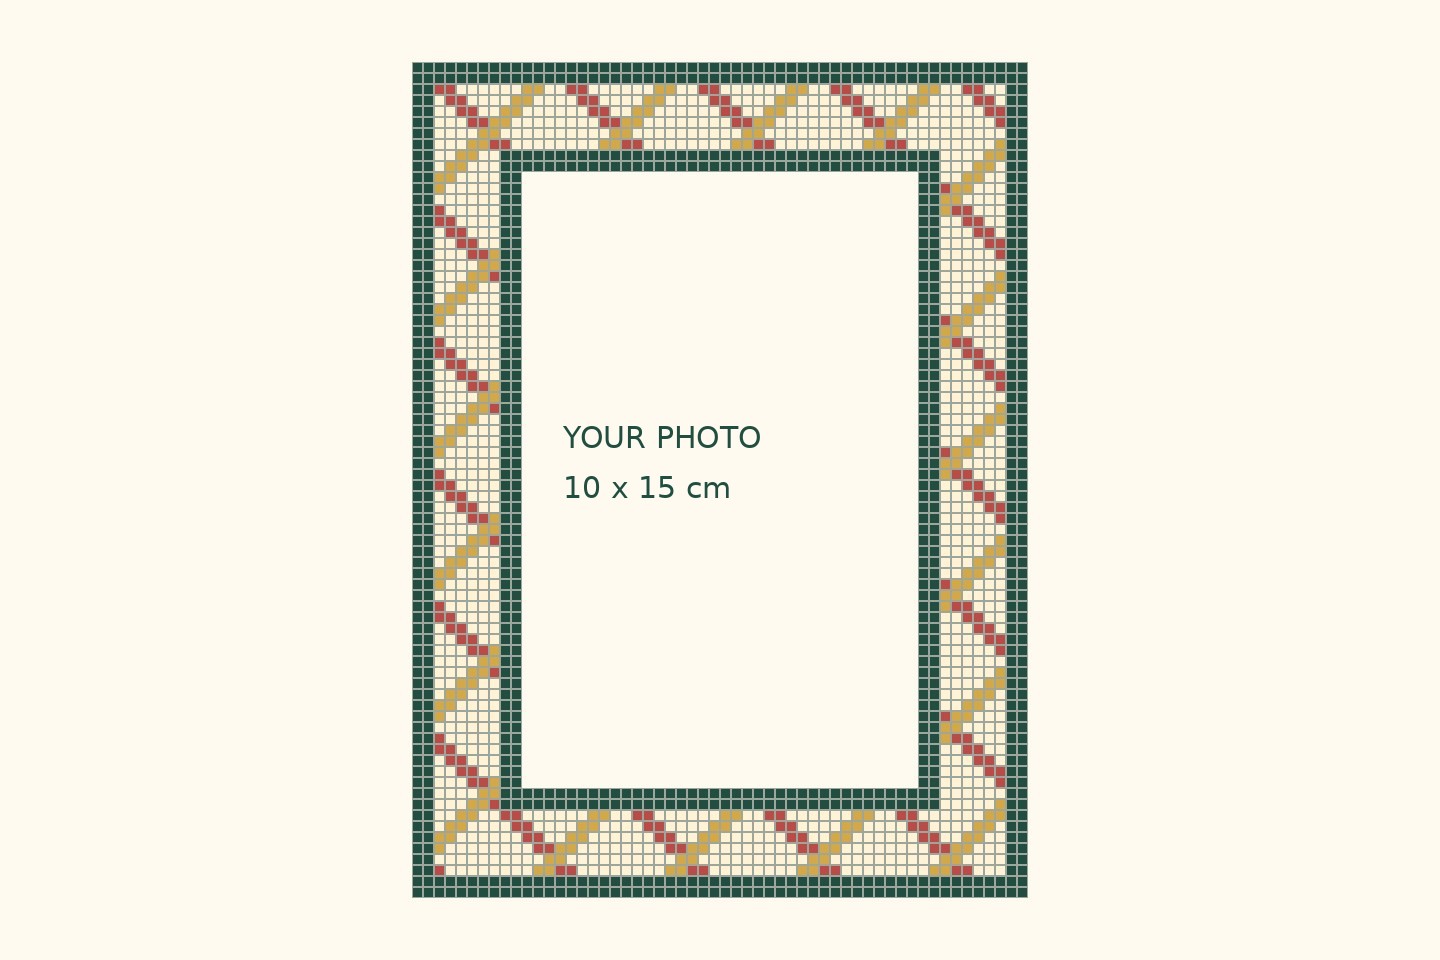
The photo is ready, but a wide decorated border disappears precisely over a face. With this diamond painting photo frame, you therefore see before pasting which part remains visible. The free cutting template has an opening of 9 × 14 cm for a photo of 10 × 15 cm.
You make a decorative frame with drills around a regular photo. The outer dimension is 14 × 19 cm. The pattern requires 2,240 square drills at a grid spacing of 2.5 mm. Carrier, adhesive material, photo and a matching holder are chosen separately.
Download the border pattern and cutting template (4 pages)
Diamond painting photo frame: does the photo fit behind the opening?
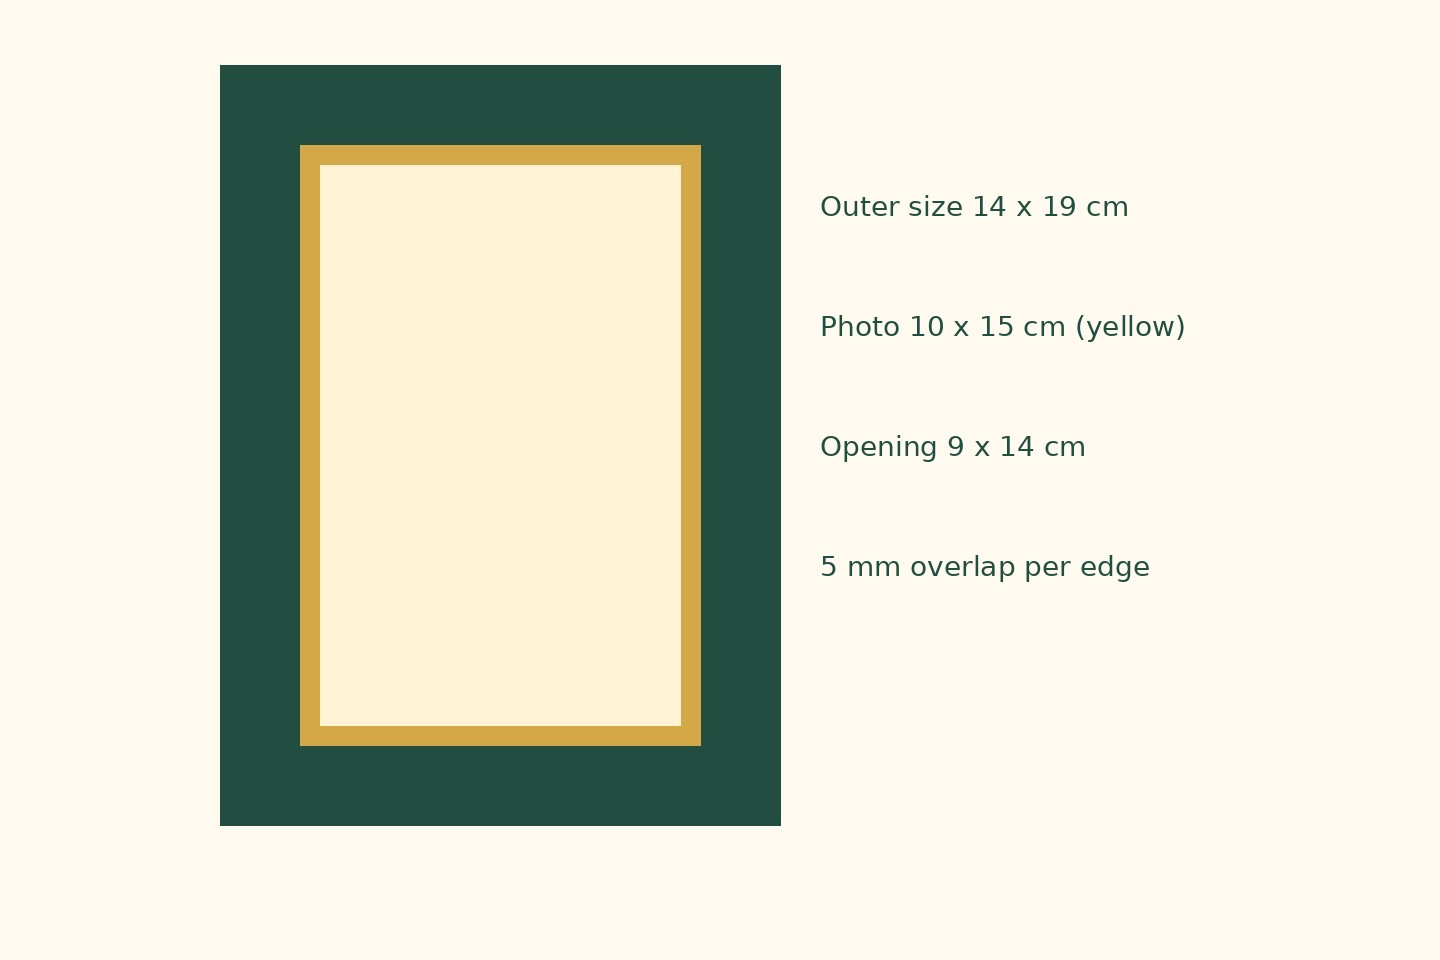
An opening that is the same size as your photo leaves no overlap. This template therefore covers 5 mm of each photo edge when you center a real print of 100 × 150 mm precisely. The photo does not need to be cut smaller.
Measure the print yourself. A photo sold as "10 × 15" may have a deviating size. If your print is 102 mm wide, for example, the overlap when centering becomes 6 mm per side. Use the dotted line as a size example, not as an order to cut your photo.
| Part | Size | Meaning |
|---|---|---|
| Outer edge | 140 × 190 mm | 56 × 76 grid cells |
| Opening | 90 × 140 mm | 36 × 56 cells remain open |
| Photo as starting point | 100 × 150 mm | 5 mm overlap all around when centering |
| Decorated border | 25 mm wide | 10 cells along each side |
The photo deserves more attention than the glitters
For an anniversary, Mother's Day or Valentine's Day, I would choose the photo first and only then the drills. A recognizable moment does more than an extra decorative motif. Lay the cut-out paper opening over your print: do faces, hands and any date remain fully visible?
This narrow overlap does not solve every photo. If someone stands at the edge of the image, even 5 mm can be too much. Choose a different crop or a larger frame then. Cutting the opening larger without a new pattern can interrupt the decoration; the stock list won't match anymore either.
How do you count the corners only once?
The full grid counts 56 × 76 = 4,256 cells. The opening of 36 × 56 = 2,016 cells goes off that. 2,240 drills remain. The PDF divides them into four work strips: top and bottom including the corners, left and right only the middle piece.
| Symbol / color proposal | Count |
|---|---|
| C · cream | 932 |
| G · dark green | 896 |
| R · red | 188 |
| Y · yellow | 224 |
| Total | 2,240 |
Each work strip has 560 drills, but not the same color distribution. The correct counts are with each strip in the PDF. The color letters do not refer to fixed DMC numbers. Compare your stock with the DMC color chart and maintain sufficient light-dark contrast.
From cutting template to a usable frame
A bead frame requires a base that carries the decoration. Craft Club uses a printed adhesive carrier with its frame kits. Our download is just a pattern and template; there is no self-adhesive frame included. You must test the fit and adhesion of your materials yourself.
- Print page two at 100%. The check line must measure 50 mm. Fix the print setting before you cut material.
- Cut the paper outer shape and opening first. Check the cut on your real photo. The dotted line is the photo position, not a cutting line.
- Copy the outer edge and opening onto a suitable flat, sturdy carrier. Cut them with matching tools on a cutting mat; have an adult do this for a children's project.
- Use a matching blank adhesive grid or suitable adhesive material on the border. Test a small piece first. Follow the grid pattern; leave the opening free.
- Position the photo behind the dry border and fix it with photo corners on a suitable backplate. Use a copy for the test; do not paste unknown glue on an irreplaceable original photo.
- Fit the frame in a holder that supports the entire construction. This template contains no stand or suspension system. Check the stability before you put the gift down.
A frame for a finished diamond painting is a different job. For that, the guide on storing and framing diamond painting remains the appropriate route. This template frames a regular photo and does not replace a commercial photo frame construction.
A paper test on your chosen photo first
The grids, counts and PDF sizes have been digitally checked. We have not made a physical copy; strength, weight and adhesion have not been tested. Especially a thin cardboard border can bend under the drills. A test with your own carrier remains necessary.
If you want to convert the photo into drills yourself, start at diamond painting converter and compare the result via make diamond painting pattern. Determine the size again with diamond painting size calculator for that; a 10 × 15 cm photo is not automatically a suitable grid portrait. The Studio PDF is paid, this fixed frame worksheet is free.
Place the paper opening on your photo now. Only when the right moment remains fully in view is it useful to make the border and choose a date for the gift.